Skip to content

Login & Security

Intra AI protects your account with strong passwords, optional two-factor authentication (2FA), passkeys, and single sign-on. This page walks you through every sign-in method, how to lock your account down tighter, and how to manage the devices that are currently logged in.

Note: Your administrator creates your account – there is no public self-registration and no social logins (Google, GitHub, etc.). Which sign-in methods appear on your login screen depends on what your administrator has configured.


What this page covers


Email and password login

This is the primary sign-in method for all local accounts.

Step-by-step

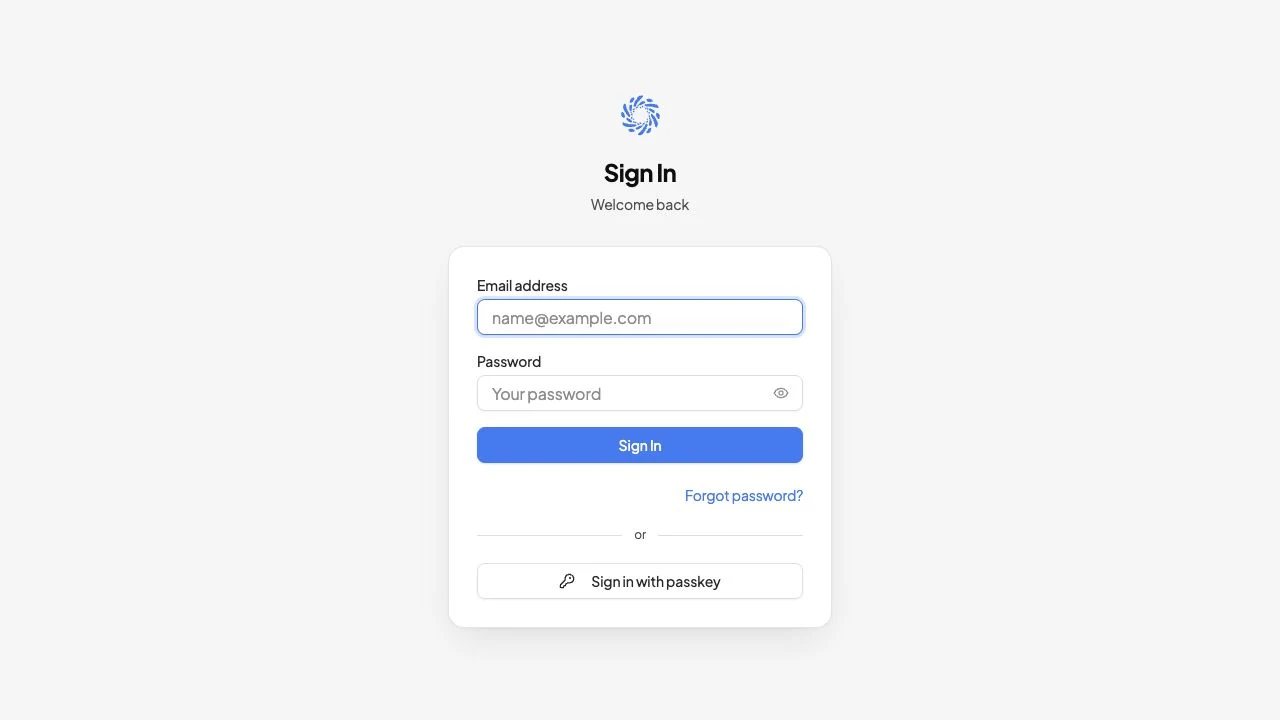
  1. Open Intra AI in your browser. You will see the login card with an Email field and a Password field.
  2. Enter your email address and your password, then click Sign in.
  3. If your administrator has enabled two-factor authentication (or if you have set it up yourself), you will be taken to a second screen to enter your authenticator code. See Two-factor authentication.
  4. If your administrator requires you to accept the terms of use on first login, a dialog appears before you reach the app. You must accept it to continue.

Brute-force protection

Intra AI limits failed sign-in attempts to prevent password guessing:

ProtectionWhat it does
Per-account limitCaps repeated failed attempts against a single account (default 10 attempts per 15 minutes).
Per-IP limitCaps failed attempts coming from one network address (default 50 attempts per 15 minutes).
Temporary banSustained attacks trigger a temporary block; each further breach extends it.

Only failed attempts count against these limits – a successful sign-in never counts against you. The exact thresholds are set by your administrator.

Tip: If you are locked out after too many failed attempts, wait a few minutes and try again. If your account status is in question, ask your administrator.

Session length

When you sign in successfully, Intra AI keeps you signed in for up to 7 days and silently refreshes your access in the background. You will not be asked to sign in again unless you sign out, your session is revoked, or the 7-day window expires.


Password reset

If you have forgotten your password, you can request a reset link yourself.

Step-by-step

  1. On the login screen, click Forgot password (below the Sign in button).
  2. Enter your email address and submit the form.
  3. Check your inbox. You will receive a one-time, time-limited reset link.
  4. Click the link in the email and enter your new password twice to confirm.
  5. Your new password must be at least 12 characters and must pass a strength check – very common or easily guessed passwords are rejected.

Note: Resetting your password signs you out of every session on all devices. After you set the new password you are not left logged in – you must sign in again with your new password.

Note: Password reset requests are rate-limited per network address. If you request too many resets in a short time, you will need to wait before trying again.

Passwords are never stored in readable form – Intra AI stores only a secure hash, so even a database leak does not expose your password.


Two-factor authentication (TOTP)

Two-factor authentication (2FA) adds a second step after your password: a short code from an authenticator app on your phone. Even if someone learns your password, they still cannot sign in without the code.

TOTP stands for "time-based one-time password" – it is the industry-standard method used by apps like Google Authenticator, Microsoft Authenticator, Authy, and 1Password.

Set up 2FA

Note: Your administrator may require 2FA for everyone on the instance, or leave it optional. Either way, the setup steps are the same.

  1. Open Settings (the gear icon or your avatar in the sidebar) and go to the Security tab.
  2. Under Two-factor authentication, click Enable 2FA.
  3. A setup wizard opens. Click Start setup on the intro screen.
  4. Open your authenticator app and scan the QR code shown on screen. If you cannot scan, tap the copy icon next to the secret to copy the key and paste it manually into your app.
  5. Your app will now show a 6-digit code that changes every 30 seconds.
  6. Save your backup codes. Before you confirm setup, Intra AI shows you 10 one-time backup codes. Each code can be used once to sign in if you ever lose access to your authenticator app. Copy them or download them as a text file and store them somewhere safe – a password manager is ideal.
  7. Enter the current 6-digit code from your app and click Activate 2FA. If the code is accepted, 2FA is now active on your account.

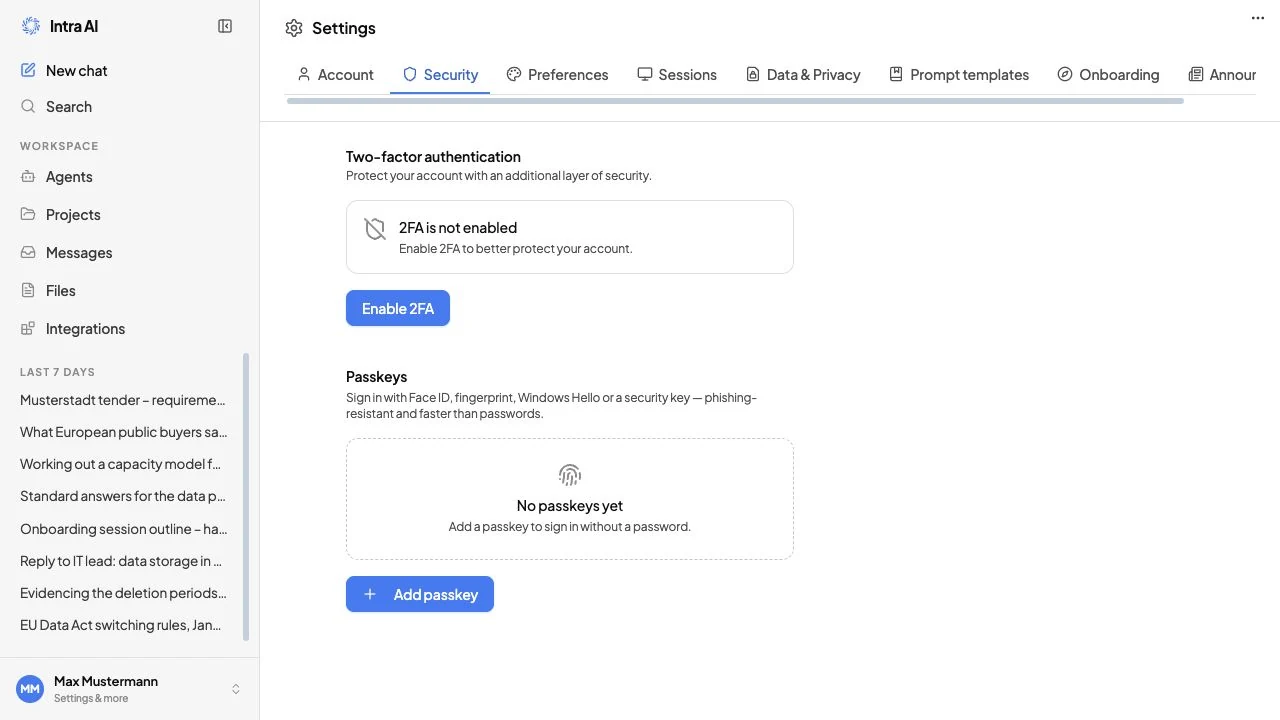
Two-factor authentication and passkeys in your security settingsTwo-factor authentication and passkeys in your security settings

Warning: If you skip saving your backup codes and later lose your phone, your only option is to ask your administrator to reset your 2FA. There is no self-service recovery without either your authenticator app or a backup code.

Signing in with 2FA active

Once 2FA is enabled, every sign-in works like this:

  1. Enter your email and password as normal and click Sign in.
  2. A second screen appears asking for your authenticator code.
  3. Open your authenticator app, find the Intra AI entry, and enter the current 6-digit code. You can also enter one of your backup codes here.
  4. Click Verify to complete sign-in.

The code entry screen is rate-limited – too many wrong guesses will temporarily lock that sign-in attempt.

Managing 2FA after setup

Under Settings → Security you have three additional actions once 2FA is enabled:

ActionWhen to use it
Register new deviceYou got a new phone and want to link a fresh authenticator app. You will need your current password and current code to start.
Regenerate backup codesYour old backup codes are used up or lost. Generating new ones invalidates the old ones entirely. Requires your current password and a valid code.
Disable 2FARemove 2FA from your account (only available if your administrator has not made it mandatory). Requires your password and a valid code.

Note: If your account is managed via single sign-on (SSO), two-factor settings are controlled by your identity provider and are not shown in Intra AI settings.


Passkeys (WebAuthn / FIDO2)

A passkey is a way to prove your identity using something you already have – your device's fingerprint reader, face scan, platform login (Windows Hello, Touch ID), or a physical hardware security key (like a YubiKey). No password to type, no code to look up.

Passkeys are based on the WebAuthn/FIDO2 standard and work in any current browser that supports it – including Chrome, Edge, Safari, and Firefox. Intra AI feature-detects support and only shows passkey options when your browser can use them.

Note: Passkeys are only available when your administrator has enabled this feature. The section is hidden entirely if passkeys are turned off for your workspace. Passkeys are also not available to accounts managed through single sign-on.

What a passkey does in Intra AI

Passkeys have two roles:

RoleWhat it means
Second factor (default)Owning at least one passkey satisfies any workspace-wide 2FA requirement. You can use a passkey instead of an authenticator app after entering your password.
Passwordless sign-inWhen your administrator enables passwordless login, a Sign in with passkey button appears on the login screen. You can sign in with one tap – no password needed.

Register a passkey

  1. Go to Settings → Security.
  2. Scroll to the Passkeys section. If your browser does not support passkeys, a notice will say so and the Add button will not appear.

The Security tab in Settings showing two-factor authentication and the Passkeys sectionThe Security tab in Settings showing two-factor authentication and the Passkeys section 3. Click Add passkey. 4. A dialog asks you to confirm your identity with a step-up check: enter your current password (and your authenticator code if 2FA is enabled on your account). 5. Optionally give the passkey a name (e.g. "MacBook Touch ID" or "YubiKey 5"). You can leave this blank and rename it later. 6. Click the register button. Your browser will show a prompt asking you to use your fingerprint, face, PIN, or hardware key. 7. Complete the device prompt. The passkey is registered and appears in your list.

You can register multiple passkeys – for example, one for your laptop and one for your phone.

Sign in with a passkey (passwordless)

This flow is only available when your administrator has enabled passwordless passkey login and your browser supports WebAuthn.

  1. On the login screen, click Sign in with passkey (shown below the email/password form, after an "or" divider).
  2. Your browser prompts you to select a passkey and authenticate with your device (fingerprint, face, PIN, or hardware key).
  3. Complete the prompt. You are signed in immediately – no password or code required.

Tip: Even without clicking the button, your browser may suggest saved passkeys in the email field's autofill dropdown. Selecting one there starts the same passkey sign-in.

Manage your passkeys

In Settings → Security → Passkeys you can:

ActionHow
Rename a passkeyClick the pencil icon next to the passkey and type a new name, then click the tick to save.
Remove a passkeyClick the trash icon. You will need to confirm with your password (and authenticator code if 2FA is enabled).

Each passkey shows its creation date and the last time it was used. A Synced badge means the passkey is backed up to your device's platform (e.g. iCloud Keychain or Google Password Manager) and will be available across your other devices too.

Warning: If you try to delete the last passkey on your account and your workspace requires at least one MFA method, the deletion will be blocked. Add a different second factor first.


OIDC single sign-on

If your organisation uses a central identity provider – such as Authentik, Keycloak, or Dex – your administrator can configure Intra AI to let you sign in with your existing organisational credentials.

When SSO is enabled, a button labelled Sign in with [Provider name] appears on the login screen below the email/password form.

Step-by-step

  1. On the login screen, click Sign in with [your provider].
  2. You are redirected to your organisation's identity provider login page.
  3. Sign in there with your usual organisational credentials (username, password, MFA – whatever your organisation requires).
  4. You are returned to Intra AI and signed in automatically.

No Intra AI password is set or needed for SSO accounts.

SSO account rules

  • Intra AI never silently links an SSO identity to an existing local account. If your identity provider reports an unverified email address, or if that address already belongs to a local account, access is blocked rather than merged. Contact your administrator to resolve this.
  • When your account is managed through SSO, you cannot set a local password, change your display name or username, register passkeys, or manage 2FA inside Intra AI. All of those details are owned by your identity provider.

Note: The SSO button only appears when your administrator has enabled it. If you expect to see it and do not, ask your administrator.


Active sessions

Every time you sign in from a browser or device, Intra AI creates a session. You can see all active sessions and close any you do not recognise.

View and manage sessions

  1. Open Settings → Sessions.
  2. You will see a list of all active sessions. Each entry shows:
    • The browser / device name
    • The date and time the session was created
    • The IP address it came from
    • A This session badge on your active session

Active sessions list with the current session highlighted and individual revoke actionsActive sessions list with the current session highlighted and individual revoke actions

Revoke a single session

Click the trash icon next to any session that is not your current one. That browser is signed out almost immediately – within about a second it is redirected to the login screen.

Sign out everywhere else

If you want to close all other sessions at once, click Sign out all others (shown when there is at least one other session). A confirmation dialog will tell you how many sessions will be closed. Confirm to close them all.

Sign out of your current session

You cannot revoke your own current session from the sessions list. Use the Sign out option from your account menu instead.

Tip: If you ever think someone else may have access to your account, the fastest response is to change your password. A password change signs out every session except your current one and takes effect within seconds on all devices.


Accepting the terms of use

If your administrator has enabled a terms-of-use gate, you must accept the terms before you can use Intra AI. This applies to new accounts and whenever the terms are updated to a new version.

How it works

  • After you sign in (including any 2FA or passkey step), a modal dialog appears with the terms text.
  • You cannot dismiss the dialog by pressing Esc, clicking outside it, or closing it – you must respond.
  • Click I accept to proceed. You will then be taken to the app (or to 2FA setup if that is also required).
  • Click I do not accept if you do not accept. You will be signed out immediately and returned to the login screen with a notice.

Your acceptance is recorded with the date, time, IP address, and the version of the terms you accepted. You can review this under Settings → Data & Privacy. If your administrator updates the terms to a new version, the dialog appears again on your next login.


What's not supported

Not availableReason
Self-registrationAccounts are created by your administrator only.
Social logins (Google, GitHub, Apple, etc.)Not implemented by design.
LDAP / Active DirectoryNot supported.
SAMLNot supported.
Shared or anonymous accountsEvery user must have their own individual account.

Reference

Login screen elements

ElementWhen it appearsWhat it does
Email + Password fieldsAlwaysPrimary sign-in for local accounts
Forgot password linkAlways (local accounts)Starts the password reset flow
Sign in with passkey buttonWhen admin enables passwordless passkeys AND browser supports WebAuthnSigns you in using a device passkey – no password needed
Sign in with [Provider] buttonWhen admin enables OIDC SSORedirects to your identity provider

Security settings

FeatureLocationWhat you can do
Two-factor authenticationSettings → SecurityEnable, re-enroll, regenerate backup codes, or disable TOTP 2FA
PasskeysSettings → SecurityRegister, rename, or delete passkeys (hidden for OIDC accounts and when passkeys are disabled by admin)
Active sessionsSettings → SessionsView all signed-in devices, revoke individual sessions, or sign out all others
Terms historySettings → Data & PrivacyReview when you accepted each version of the terms

Troubleshooting

SymptomLikely causeWhat to do
"Invalid credentials" on loginWrong password or mistyped emailDouble-check both fields. Use Forgot password to reset.
Locked out after failed attemptsRate limit hitWait a few minutes and try again. Contact your administrator if the ban persists.
No SSO / "Sign in with …" buttonOIDC not enabled on this instanceAsk your administrator whether SSO has been configured.
No "Sign in with passkey" buttonPasswordless passkeys not enabled by admin, or the browser does not support WebAuthnCheck with your administrator. Passkeys work in any current browser that supports WebAuthn/FIDO2 – for example recent Chrome, Edge, Safari, or Firefox.
Passkeys section missing in SettingsPasskeys feature disabled by admin, or account is managed via SSOAsk your administrator. SSO accounts cannot use passkeys in Intra AI.
Lost authenticator app – still have backup codesNormal recovery pathUse a backup code in place of the 6-digit code on the 2FA sign-in screen.
Lost authenticator app AND backup codesLocked out of 2FAAsk your administrator to reset your 2FA. There is no self-service recovery in this case.
Lost a passkey (broken/lost device)Passkey is gone from your deviceSign in with your password (and 2FA code if needed), go to Settings → Security → Passkeys, remove the old entry, and add a new passkey from your new device.
"Your account is suspended" on loginAdministrator has suspended the accountContact your administrator.
Terms dialog reappears after acceptingTerms were updated to a new versionRead and accept the updated terms to continue.
Password reset link not arrivingEmail in spam, or wrong address enteredCheck your spam folder. Make sure you entered the email address your account was created with.

Frequently asked questions

Q: Can I sign in on multiple devices at the same time? A: Yes. Each device creates its own session. You can see and manage all of them under Settings → Sessions.

Q: Does resetting my password sign me out everywhere? A: Yes – a password reset signs out every session on all devices; you then sign in fresh. (Changing your password from Settings → Security keeps your current session.)

Q: Do I have to set up 2FA? A: It depends on your administrator's policy. If 2FA is required for your workspace, you will be redirected to the setup wizard after your first login and cannot skip it. If it is optional, you can enable it any time under Settings → Security.

Q: Can I use a passkey instead of my authenticator app for 2FA? A: Yes. Registering a passkey satisfies any workspace 2FA requirement. Once you have a passkey, you can use it at the 2FA step instead of typing a code from your authenticator app.

Q: I have an SSO account. Can I also set a local password? A: No. SSO accounts are fully managed by your identity provider. Local passwords, display-name changes, and passkey registration are not available for SSO accounts.

Q: What happens if I decline the terms of use? A: Declining suspends your account: you are signed out of every session immediately, and your account is locked and scheduled for permanent (cryptographic) erasure after the retention window (30 days by default; your administrator can change this). You cannot simply sign back in – attempting to log in shows 'Account suspended'. If you decline by mistake, contact your administrator to have the account restored before the erasure window elapses.

Q: How are my credentials protected? A: Passwords are never stored in readable form – only a secure hash is kept. Access tokens are short-lived (15 minutes) and use RS256 signing. Your session cookie is HttpOnly and Secure, meaning it cannot be read by page scripts and only travels over encrypted connections.


Related: Settings · Getting Started